Craft & Cork >> Winemaking
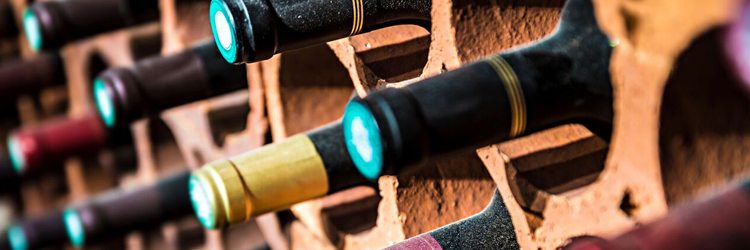
10 easy tips for producing cellar stable wines
Whether you are a seasoned craft winemaker or you’re trying your hand at it for the first time, your goal should always be to produce wines that reflect the grape varietal and wine style, and will remain stable once bottled. After all, when you are making 30 bottles at a time, you want to enjoy the last bottle opened just as much, or even more, than the first! To make cellar stable wines, the winemaker needs to be aware of two main adversaries: oxidation and contamination.
While oxygen is integral to the winemaking process, every winemaker should understand when to exclude it to ensure cellar stable wines. Here are my top 10 tips to help you make a delicious wine, capable of standing the test of time.
1) Use fresh juice – Using the freshest juice possible will maximize the cellaring capability of your wine. When making any RJS wine kit, always check and record the date code from the sticker on top of each box. This code indicates the date that your wine kit was assembled.
2) Cleaning & sanitation – Sanitation is essential for producing cellar stable wines. I recommend reading through RJS Craft Winemaking’s sanitation chapter.
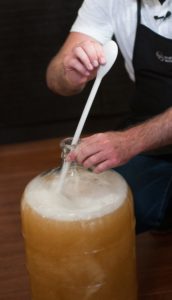 3) Degassing – Ensure that your wine is fully degassed BEFORE adding the sulphite during the stabilization process. This will enhance the efficiency of the sulphite and protect your wine against oxidation and microbial contamination.
4) Stabilization/clarification – Once your wine has reached its target specific gravity (indicated in the instructions), stabilize and clear your wine within 48 hours. By protecting your wine soon after the completion of fermentation, you are limiting its exposure to oxygen and spoilage-causing microorganisms.
5) Dissolve sulphite/sorbate – Prior to adding sulphite and potassium sorbate to your wine, dissolve it first into 1 cup of the wine. This will help to prevent clumping of the stabilizing agents and will maximize their efficiency.
6) Stir gently – When making any additions to your wine, always stir gently as opposed to vigorously. This will help limit the amount of oxygen introduced to your wine during the winemaking process.
7) Limit number of rackings – Try to limit the number of rackings to no more than three. This will help limit the amount of oxygen introduced as well.
8) Top-up – As soon as your wine has been cleared and stabilized, keep the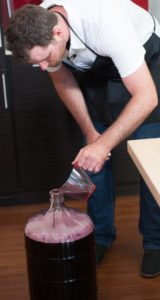 carboy topped up to 23L/6gal at all times.
9) Additional sulphite – If you are planning on aging your wine for greater than 6 months, it is highly recommended to add an additional ¼ TSP of sulphite 48 hours before bottling.
10) Storage temperature – Aging your bottles at a temperature of 12°C/55°F will help ensure that the wine you have worked so hard to make will age gracefully until opened!
If you follow these 10 easy tips, I am very confident that you will be able to produce wines that not only will age beautifully in bottle, but once you open and serve them, your friends will rave about them for years to come!
 Chris Holman has been making wine professionally since 2006, which has led him to work in regions such as the Niagara Peninsula, Okanagan Valley, McLaren Vale South Australia, and Tasmania. Chris earned a 2 year diploma at Niagara College in Winemaking and Viticulture in 2008 and more recently he received a 4 year B.Sc degree majoring in Oenology and Viticulture at Brock University in 2015. His academic achievements in addition to his technical winemaking experience will allow him to provide our customers with excellent technical support and new ideas, helping them continue to make excellent wines.
Comments are closed.